
Making a Geiger Counter with ESPHome and Home Assistant
After a discussion with a friend about ridiculous things to hook up to a Home Automation system, I figured it out.
Hardware and Prerequisites
For this project you will need the following:
- A Working Home Assistant Install
- ESPHome installed and available
- An ESP32 or ESP8266
- A RadiationD-v1.1(CAJOE) Geiger Counter
The Geiger Counter counter can be found from $30 USD to $100 USD across aliexpress, amazon, and ebay. You can usually find unassembled versions for a little cheaper, but the board is relatively dense and its not much more expensive for an assembled version. Regardless of which version you choose, make sure you install your Geiger-Müeller Tube in the correct direction, polarity matters.
Assembly and Setup
Once you get your Geiger Counter assembled according to the instructions it is time to test. You need to hook it up to power. It came with a handy little USB plug, but that didn’t end up working for me. The device draws ~15mA of power which means that we can skip the outside power supplies and hook it right up to the ESP. I am using a NodeMCU ESP32-s.
There are three pins on the left side of the board labeled GND, 5V, and Vin. GND is Ground and 5v is your 5v power input. Confusingly the pin labeled Vin is just your data pin; we will address this one later.
If you are using a NodeMCU (ESP8266 or ESP32) you can hookup ground to any ground pin (I had issues with the device not booting if I used the bottom left pin on my ESP32 based NodeMCU.). Hook up 5v to the Vin pin on the bottom left of your NodeMCU. Then go ahead and plug USB in directly and the device should power up. Be careful because the GM Tube has a charge of around 500 volts.
Testing the Device
You should see one light on the right side of the board light up solid. It’s normal to have some background radiation, so you should hear a click accompanied by the LED in the lower left of the board flashing 20-40 times per minute.
Here is a video showing correct powered up operation.
Note that this device only detects Beta and Gamma particles. It won’t work for those of you wanting to detect alpha sources like Radon Gas.
Prepping the Microcontroller
We are going to be using ESPHome because it makes things easy. It allows you to define pins and parameters for code instead of learning Arduino. It lets you specify that information and automatically compiles.
I am going to post code here, but you should really just checkout my GitHub.
1
2
3
4
5
6
7
8
9
10
11
12
13
14
15
16
17
18
19
20
21
22
23
24
25
26
27
28
29
30
31
32
33
34
35
36
37
38
39
40
41
42
43
44
45
46
47
48
49
50
51
52
53
54
55
56
57
58
59
60
61
62
63
64
65
66
67
68
69
70
71
72
73
74
75
76
77
78
79
substitutions:
  devicename: geiger
  upper_devicename: Geiger Counter

esphome:
  name: $devicename
  platform: ESP32
  board: nodemcu-32s

wifi:
  ssid: !secret wifi_ssid
  password: !secret wifi_password

  ap:
    ssid: ${upper_devicename} Fallback Hotspot
    password: !secret fallback_password

captive_portal:

# Optional manual IP
#  manual_ip:
#    static_ip: 192.168.0.195
#    gateway: 192.168.0.1
#    subnet: 255.255.255.0

# Enable logging
logger:

# Enable Home Assistant API
api:
  password: !secret api_password

ota:
  password: !secret ota_password

switch:
  - platform: restart
    name: ${upper_devicename} Restart

text_sensor:
  - platform: wifi_info
    ip_address:
      name: ${upper_devicename} IP Address
    ssid:
      name: ${upper_devicename} Connected SSID
    bssid:
      name: ${upper_devicename} Connected BSSID

sensor:
  - platform: pulse_counter
    pin: GPIO36
    name: ${upper_devicename}
    id: "geiger_counter"
    unit_of_measurement: 'CPM'
    on_raw_value:
      - sensor.template.publish:
          id: radiation_level
          state: !lambda 'return x / 153.8;'
          # this was what I got for my data sheet and it matched reasonably well with the background data that I have.  Many people are using other values.
  - platform: template
    name: "Radiation Level"
    id: "radiation_level"
    unit_of_measurement: 'µSv/h'
    icon: mdi:radioactive
    accuracy_decimals: 5

binary_sensor:
  - platform: template
    device_class: safety
    name: "Radiation Warning"
    # This doesn't necessarily represent a "dangerous" count, but one that is abnormally high
    lambda: |-
      if (id(geiger_counter).state > 100) {
        // High Count.
        return true;
      } else {
        // Normal Count.
        return false;
      }
Add that into your ESPHome and upload in your preferred manner. I like to have ESPHome compile the binary and download it to my local machine because my Home Assistant server is not available nearby. You can flash the bin file to your ESP with a tool like ESPHome flasher. I ended up having to use this instead of my normal method because of something to do with formatting the ESP partitions. Disconnect the power wire from the Geiger Counter during your flash just for safety. Something weird might happen because of the high voltages.
Once you get this all set up, go ahead and hook the pin erroneously labeled Vin on the Geiger Counter to the data pin you specified in your ESPHome YAML file. I used GPIO 36. Once everything is hooked up, go ahead and reconnect the power wires, and plug your ESP device into power.
Bringing it all into Home Assistant
ESPHome supports autodiscovery, so you should get a notification in Home Assistant to add the device. If not, go ahead and go to Configuration>Integrations and hit the big + ADD INTEGRATION at the bottom right. If your network is setup properly, you can choose esphome and type in geiger.local for the host, if not go ahead and login to your router and find the geiger counter’s IP address and type it in the host.
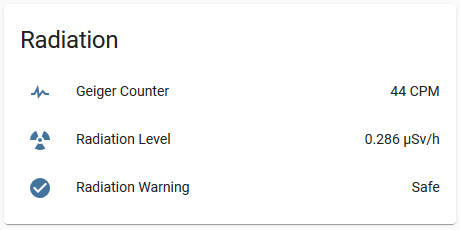
Once you get this all sorted you should see three new entities in Home Assistant.
- sensor.geiger_counter
- sensor.radiation_level
- binary_sensor.radiation_warning
Go ahead and add them to Lovelace. Right now I am being pretty simple about it.
In the a future post, I may share how I am working with this data.
- Creating a notification for high radiation levels
- Creating a history stats sensor to track average, and high/low levels
- A node red flow that gets this data as well as the location of the sensor, and shares it with the Safecast API.
Disclaimer: some of the product links may be affiliate links. I haven’t been contacted by any vendors or companies, I am just using them for encouragement to write more content.